Face Morphing
Image Processing, UCL ·
Overview
I did not use any OpenCV morphing functions. The affine solve, the point-in-triangle test, the bilinear resampling and the blending are all implemented by me, and OpenCV is only used for image I/O and colour conversion.
The two faces are Rembrandt self-portraits painted roughly two decades apart, so the morph shows the same person ageing. Both paintings are in the public domain. I rotate and scale each one so that the eyes lie on a common axis before cropping, which makes the result look like one face changing instead of two faces sliding past each other.
Both methods start from the same 68 facial landmarks, which are detected with dlib. I also add 8 points around the image border so that the background warps too, instead of staying fixed at the edges. The landmarks of an intermediate frame at blend factor α are a linear interpolation of the two landmark sets, L(α) = (1 − α)·L_source + α·L_destination.
The two methods differ in how they answer the same question. Given an output pixel on the intermediate mesh, where did it come from in each of the original images? Both methods sample at that location with bilinear interpolation and blend the two colours by α.
Part 1: Delaunay triangulation
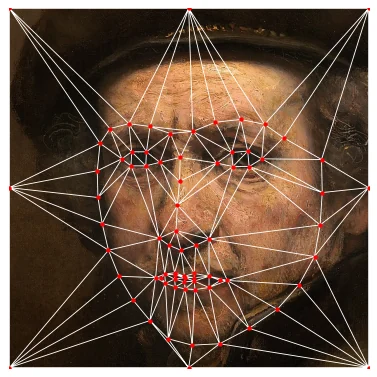
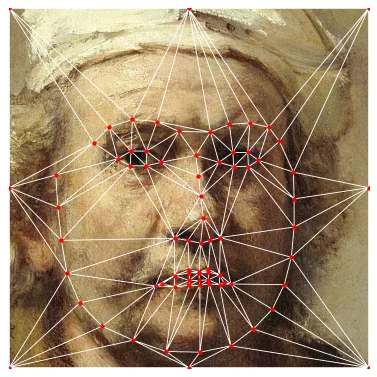
The Delaunay triangulation is computed once and reused for every frame, so triangle k of the intermediate mesh always corresponds to triangle k in both originals. I build it on the mean of the two landmark sets rather than on either face. A mesh that is Delaunay for the source is not necessarily Delaunay for the destination, so triangulating only the source would give good triangles at α = 0 and worse ones at α = 1.
This pair gives 142 triangles, and none of them fold. Every triangle keeps its orientation throughout the morph, and the smallest area any of them reaches is about 4 px². However, this is specific to this pair and is not guaranteed in general.
If the landmarks of two faces swap their relative order (usually the inner-mouth points), a triangle can flip partway through the morph and pass through zero area. Passing a degenerate triangle to the affine solve returns values on the order of 1e16 without raising an error, so I skip triangles below a minimum area.
An affine map has six unknowns, and three vertex correspondences give six equations, so each triangle's transform is an exact linear solve. I only scan the bounding box of each triangle, using a barycentric test to reject pixels outside it, since scanning the whole image for every triangle would take about 100× longer. The bounding box is then tested, warped and sampled as a single array instead of pixel by pixel, which gives roughly another 100× speedup: a 512×512 frame takes ~0.16 s instead of ~17 s.
The warp is exact within each triangle but only piecewise affine, so its derivative is discontinuous across triangle edges.
Part 2: Meshless morphing
This method does not use a triangulation at all. Every landmark influences every pixel, with the influence falling off as an inverse power of distance, κ(p, s) = 1 / (‖p − s‖^(2a) + ε). The displacement of a pixel is the κ-weighted mean of all the landmark displacements, V(p) = Σⱼ κ(p, sⱼ)·(tⱼ − sⱼ) / Σⱼ κ(p, sⱼ).
Since κ grows to its maximum of 1/ε as p approaches a landmark, a pixel on a landmark moves by exactly that landmark's displacement, while pixels far from all landmarks move by a smooth average. The result is smooth everywhere, without the creases that the triangulated version shows along triangle edges.
Running it
pip install -r requirements.txt

python morph.py --method triangulation   # 512×512, ~0.16 s/frame
python morph.py --method meshless        # 256×256, ~0.19 s/frame
For both methods, the morph reproduces the source image exactly at α = 0 and the destination image exactly at α = 1.
Try it: place your own landmarks
The meshless method is easy to run in a browser, since every landmark influences every pixel and there is no mesh to build or system to solve.
Click a feature on the left, then the same feature on the right. With only four landmarks the image barely changes, but with around twenty it starts to look like a morph. The falloff slider controls the exponent a in κ, and you can also upload your own faces and download the result as a GIF.